
Minecraft and Terraria are games that thrive on player creativity and customization. Whether you’re setting up a Bukkit server or transferring worlds, having a comprehensive guide can enhance your gaming experience. This article covers everything from Bukkit downloads to importing vanilla worlds, ensuring you have the knowledge to manage your game environments effectively.
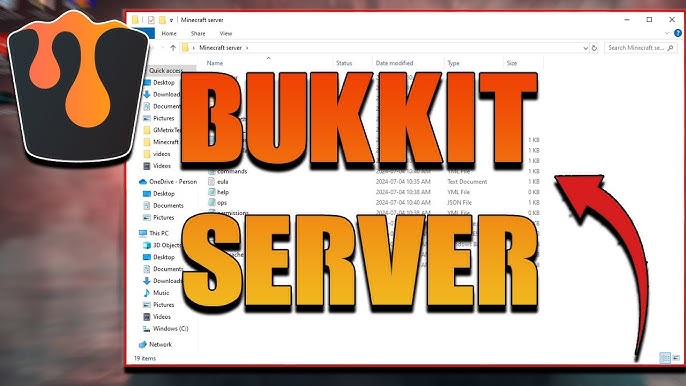
Bukkit Download and Server Hosting
Bukkit is a powerful and flexible API that allows for extensive customization of Minecraft servers. Here’s how to get started with Bukkit:
Bukkit Download
- Visit the Bukkit Website: Go to the official Bukkit website to download the latest version.
- Download CraftBukkit: CraftBukkit is the server file that integrates with the Bukkit API. Ensure you download the correct version that matches your Minecraft version.
Bukkit Server Download
- Download CraftBukkit: Once you’ve downloaded CraftBukkit, place it in a dedicated folder on your computer.
- Create a Start Script: Create a
.batfile (Windows) or a shell script (Mac/Linux) to run the server. For Windows, your script might look like this:batКопіювати кодjava -Xms1024M -Xmx1024M -jar craftbukkit.jar -o true PAUSE - Run the Server: Double-click the start script to launch your Bukkit server. Follow the prompts to set up your server settings.
Bukkit Server Hosting
- Choose a Hosting Provider: Select a reliable hosting provider that supports Bukkit servers. Some popular options include HostHorde, Akliz, and BisectHosting.
- Upload CraftBukkit: Use the hosting provider’s control panel to upload your CraftBukkit file.
- Configure Your Server: Adjust server settings, install plugins, and customize your game environment through the hosting provider’s interface.
- Start the Server: Launch your server and start playing with your friends.
How to Transfer and Import Minecraft Worlds
Managing and transferring Minecraft worlds can be essential for preserving your creations or moving them to new servers. Here’s how to handle these tasks:
How to Copy Minecraft Worlds
- Locate Your World Save Folder: Navigate to the
.minecraft/savesdirectory on your computer. - Copy the World Folder: Find the folder corresponding to the world you want to copy and copy it to your desired location.

How to Transfer Minecraft Worlds
- Copy the World Folder: Follow the steps above to copy the world folder.
- Transfer to Another Computer: Use a USB drive, cloud storage, or a file transfer service to move the copied folder to another computer.
- Paste in Saves Folder: Paste the world folder into the
.minecraft/savesdirectory on the new computer.
How to Transfer Worlds in Minecraft
- Use Realms: One of the easiest ways to transfer worlds is by using Minecraft Realms. Upload your world to a realm and then download it on another device.
- Direct File Transfer: Manually copy and paste the world files as described above.
How to Transfer Terraria Worlds
- Locate World Save Files: Navigate to the
My Documents/My Games/Terraria/Worldsdirectory. - Copy the World File: Copy the
.wldfile you want to transfer. - Transfer to Another Device: Use a USB drive or cloud storage to move the world file to another device.
- Paste in Worlds Folder: Paste the world file into the same directory on the new device.
How to Upload Worlds to Minecraft
Uploading worlds to a Minecraft server allows you to share your creations with friends or a larger community.
How to Upload a World to a Minecraft Server
- Compress the World Folder: Zip the world folder to make it easier to upload.
- Access Server Files: Use FTP or the hosting provider’s control panel to access your server files.
- Upload the Zip File: Upload the zipped world file to the server’s world directory.
- Extract and Configure: Extract the world file on the server and adjust the server properties file to load the new world.
How to Import Minecraft Worlds
Importing worlds into Minecraft allows you to load new maps or saved games easily.
Import Minecraft World
- Download or Copy the World Folder: Ensure you have the world folder ready on your computer.
- Place in Saves Folder: Copy the world folder into the
.minecraft/savesdirectory. - Launch Minecraft: Start Minecraft and select the imported world from the single-player menu.
Import Vanilla World Minecraft
- Follow the Steps for Importing: Importing a vanilla world follows the same steps as importing any other world. Just ensure that no mods or plugins are required for the world to function.
Minecraft Download World from Server
Downloading a world from a server allows you to save and explore your multiplayer creations in single-player mode.
- Access Server Files: Use FTP or the hosting provider’s control panel to access the server files.
- Download the World Folder: Locate the world folder and download it to your computer.
- Place in Saves Folder: Place the downloaded world folder into the
.minecraft/savesdirectory. - Launch Minecraft: Open Minecraft and access the world from the single-player menu.
Conclusion
Whether you’re setting up a Bukkit server, transferring worlds, or importing new maps, understanding these processes can greatly enhance your Minecraft and Terraria experiences. Follow these steps to manage your game environments effectively, ensuring a seamless and enjoyable gameplay experience.